unattended XenServer Installation without PXE
As some of you might know: I’m a big fan of unattended installations – they are reproducible, portable and document themselves in a machine readable format. Normally these installations are triggered by some software distribution system (ESD). For OS installations (e.g. XenServer) you boot from network using with DHCP with PXE options to transfer the boot image via TFTP and the ESD jumps in.
There are good reasons why network installations might not work for you: ESD licensing, other PXE services in subnet, DHCP/PXE not implemented… etc.
If you want to create a full documented unattended installation of XenServer without network boot here is the way to go: instead of booting the installer from network you are booting from CD/ISO file. The installation binaries and answerfile (defining your installation parameters) is located on a network location (http,ftp,nfs).
I use a Debian Linux with Apache webserver as installation repository. In the first step copy the whole content of the installation media to the repository.
# mount the Xenserver install media
mount -o loop XenServer-6.0.201-install-cd.iso /mnt/tmp
# create the repository within apache default website
mkdir /var/www/xs602

cp -R /mnt/tmp/ /var/www/xs602/
# do not forget to set permissions
chown -R www-data:www-data /var/www/xs602/
Next you need an answer file for the XenServer installer. Here is mine:
<?xml version=”1.0″?>
<installation mode=”fresh” srtype=”lvm”>
<bootloader>extlinux</bootloader>
<primary-disk gueststorage=”yes”>sda</primary-disk>
<keymap>de</keymap>
<hostname>xenserver01</hostname>
<root-password>putyourcleartextpasswordhere</root-password>
<source type=”url”>http://192.168.1.4/xs602/</source>
<admin-interface name=”eth0″ proto=”static”>
<ip>192.168.1.14</ip>
<subnet-mask>255.255.255.0</subnet-mask>
<gateway>192.168.1.1</gateway>
</admin-interface>
<name-server>192.168.1.4</name-server>
<timezone>Europe/Berlin</timezone>
<time-config-method>ntp</time-config-method>
<ntp-server>10.1.1.10</ntp-server>
</installation>
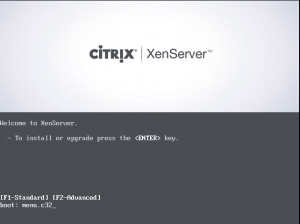
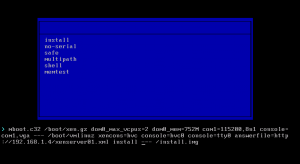
As last step fire up the target system and boot CD/ISO File. At the bootscreen enter “menu.c32″ and use [TAB] to edit the installation string. Add “answerfile=http://yourwebserver/answerfile.xml install” after “console=ttyp0″.
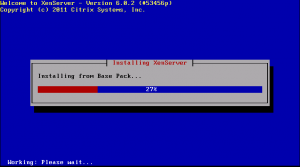
That’s all, get yourself a cup of coffee and relax while your XenServer gets installed.
Even through this is not(!) the 100% automated installation (you need to boot from a CD/ISO file and type in a small string) it helps you to have a full documented and reproducible installation. Best thing is you do not need any kind of infrastructure – just a webserver for the installation repository.